If you’re eyeing a Rivian R1T but still have kids in car seats, you’re probably wondering how well those seats actually fit. This Rivian R1T child seat fit guide walks through LATCH locations, rear‑facing and forward‑facing placement, 3‑across possibilities, and real‑world feedback from parents so you can decide if this electric pickup really works for your family.
Age & law reminder
Why the Rivian R1T Makes Sense for Families
Family‑friendly strengths
- Wide rear bench makes it realistic to run two or even three seats across with the right products.
- Flat floor and high seating position make climbing in easier for older kids.
- Big rear doors improve access when you’re wrestling bulky infant bases or rear‑facing convertibles.
- Frunk and gear tunnel storage keep strollers, scooters and sports gear out of the cabin.
Potential challenges
- Only the two outboard rear seats have LATCH; the middle seat is seat‑belt install only.
- Rear‑facing depth can get tight behind a tall driver or passenger.
- 3‑across is possible but finicky, and usually requires narrower seats and some trial and error.
The good news: with a plan and the right seats, most families find an R1T setup that works from infant through booster years.
Rivian R1T LATCH Layout at a Glance
R1T Rear Seat Child-Seat Hardware Snapshot
In the R1T, the LATCH system is limited to the two outboard rear seats. Each outboard spot gets two lower anchor bars hidden in the seat bight and a top tether anchor on the rear shelf. The center rear seat does not have lower anchors but does provide its own dedicated top tether, so you can safely install a forward‑facing seat there using the seat belt plus tether.
Straight from the Rivian manual
- Lower anchors: two per outboard rear seat (four total).
- Top tethers: three, one for each rear seating position.
- No front‑seat LATCH: the front passenger seat is not designed for child seats in US models.
- Anchor markings: look for the small child‑seat icon at the base of each outboard seatback and on the rear shelf behind each rear seating position.
Installing Different Child Seat Types in the R1T
How Common Child Seat Types Fit in the R1T
Where they go, and what to watch for
Infant seat + base (rear‑facing)
Best placed on an outboard seat using LATCH or seat belt. Many parents prefer behind the passenger so the driver isn’t pushed quite as far forward.
Most infant seats fit comfortably, but very tall front occupants may need to slide their seats a notch or two forward.
Convertible seat (rear‑facing)
The real space test. A large rear‑facing convertible can eat into front‑seat legroom, especially behind a tall driver.
Consider more compact or "slim" models if you plan to keep kids rear‑facing to age 3–4 and you or your partner are over about 6 feet tall.
Convertible / combination (forward‑facing)
Forward‑facing seats are easier to package. You can use LATCH on the outboard positions until the combined child+seat weight hits the stated limit, or install with the seat belt.
Always use the top tether in any R1T rear seating position with a forward‑facing harnessed seat.
Boosters and Belt-Positioning in the R1T
Keeping bigger kids comfortable and correctly buckled
High‑back and backless boosters
Boosters fit well on either outboard side and in the center. The R1T’s relatively flat bench helps keep them stable.
If you’re running three across, the center seatbelt buckle access can get tight next to bulky boosters; consider slimmer designs if an older child needs to reach a buckle independently.
Seat‑belt‑only riders
Once your child passes booster requirements, the R1T’s rear bench offers good visibility and legroom. Many families put the oldest child in the center seat and keep harnessed seats on the outboard positions.
Check that the shoulder belt crosses the middle of the chest and the lap belt sits low on the hips, not the stomach.
LATCH vs. seat belt in the R1T
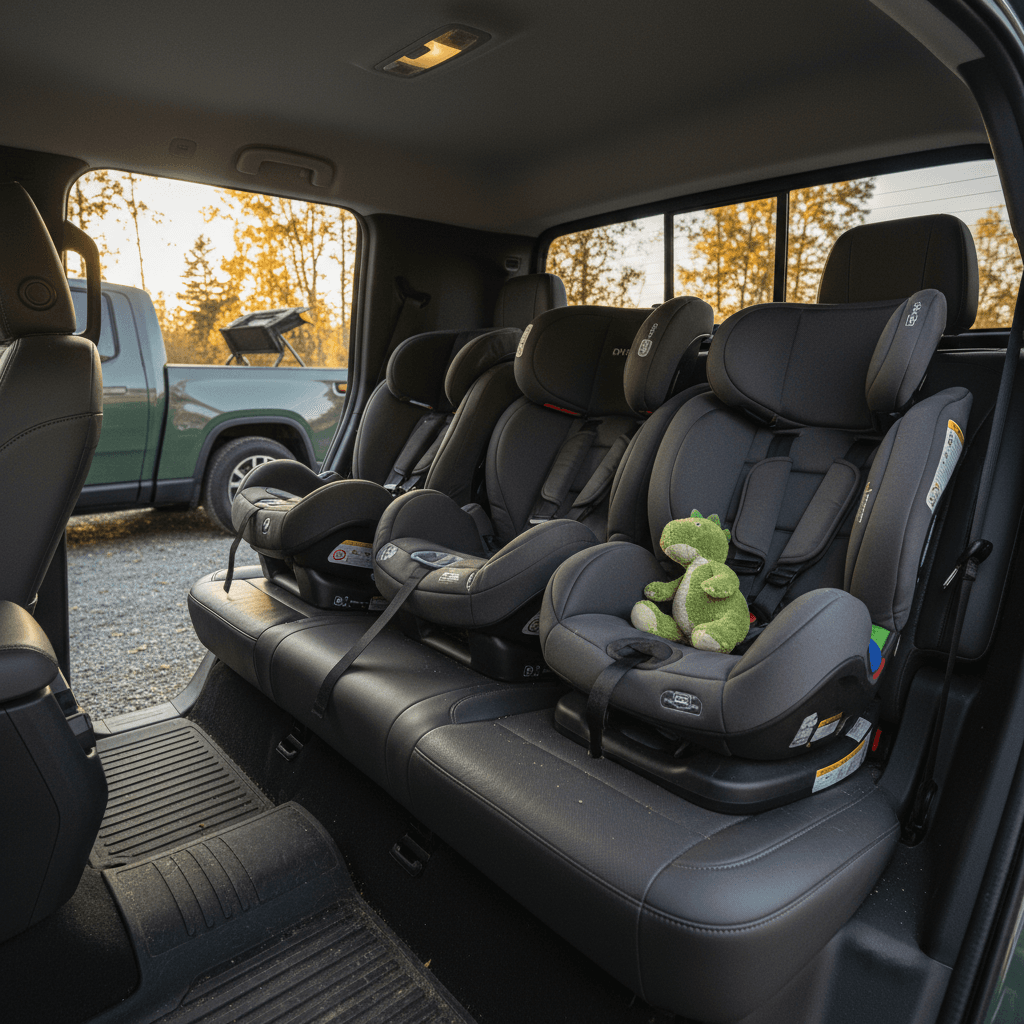
Can You Fit Three Car Seats Across in a Rivian R1T?
Short answer: yes, three across is possible in the R1T, but your exact setup matters. The truck’s rear hip room is generous compared with many midsize SUVs, and parents have reported success with two rear‑facing seats on the outsides and a narrower forward‑facing or booster in the middle. Slim models from brands like Diono, Clek and some compact Graco or Chicco seats tend to work best.
Typical 3-Across Strategies in the Rivian R1T
Example layouts families report using; always verify with your specific seats and kids.
| Left seat | Center seat | Right seat | Notes |
|---|---|---|---|
| Rear‑facing convertible | Forward‑facing harness | Rear‑facing convertible | Common for three under ~6; choose narrower convertibles. |
| Rear‑facing infant seat | High‑back booster | Forward‑facing harness | Gives the booster rider easier buckle access in the middle. |
| Forward‑facing harness | Backless booster | Forward‑facing harness | Works once the middle child is big enough for a booster. |
Use these as starting points and test in person when possible.
3‑across caution
- Look for "narrow" or "slim" models, typically around 17 inches wide.
- Avoid wide, deep cupholders that flare into neighboring seating space.
- Stagger reclines slightly if allowed by your seat to ease buckling.
- If three across proves too frustrating, many families instead use two seats plus an adult in the middle for carpools or short trips.
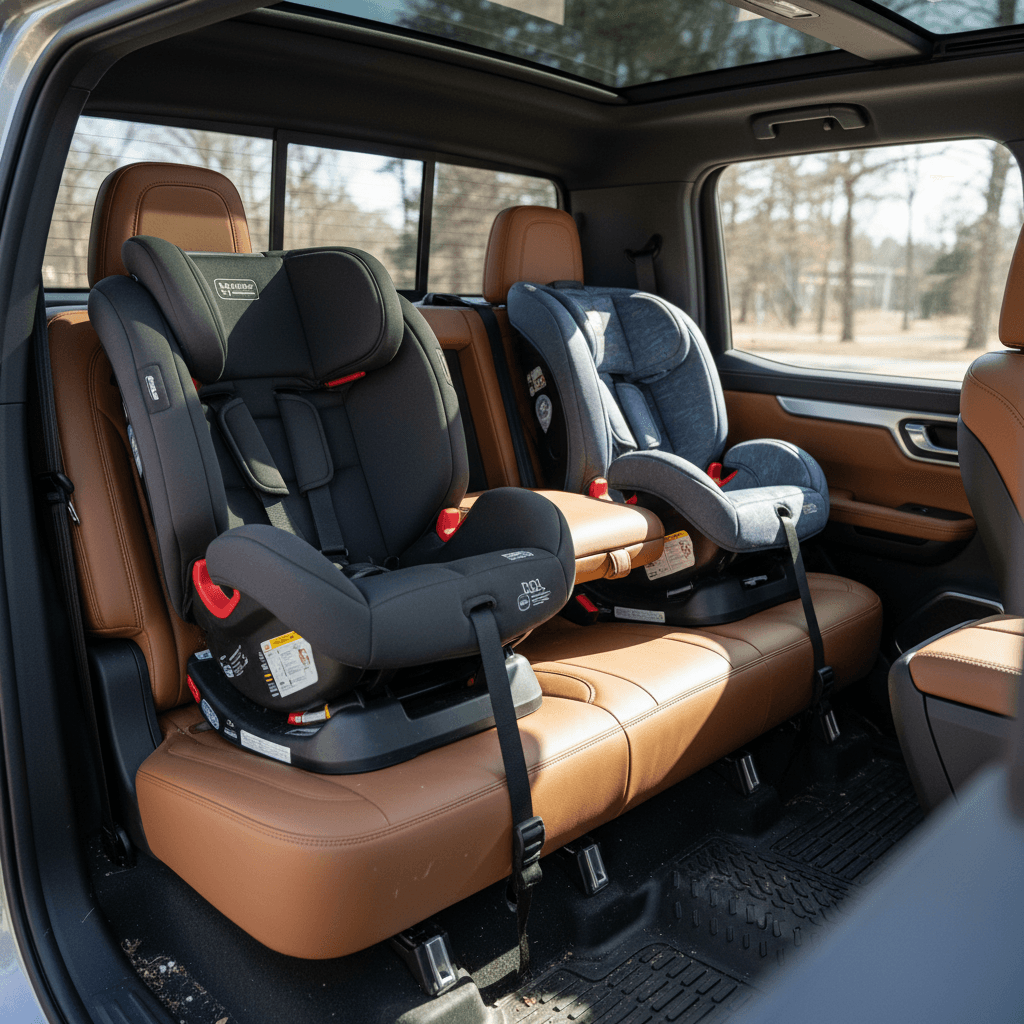
Adult in the Middle, Two Car Seats on the Sides
If you have two kids in seats and occasionally need to bring along a grandparent or another adult, the R1T’s rear bench can usually handle two outboard child seats plus an adult in the center. Parents report that it’s snug but workable, especially if the adult is on the smaller side or you’re mixing one full‑size seat with a narrower booster.
What typically fits
- One forward‑facing convertible and one booster on the sides, with a petite adult in the middle.
- Infant seat on one side, forward‑facing seat on the other, and an adult in the center for occasional trips.
- Two boosters on the sides and a belt‑only rider (older child or adult) in the middle.
Comfort trade‑offs
- The center rider’s shoulders may touch both seats, especially with taller car seats.
- Legroom is decent thanks to the flat floor, but feet may need to angle toward one side.
- On long drives, many families rotate who sits in back, or put the smallest adult in the middle.
Real-World Fit Feedback From R1T Parents
Infant seats fit great. Toddler seats are tight.
Owners who daily‑drive the R1T with kids paint a fairly consistent picture. Rear‑facing infant seats with bases tend to fit comfortably, even behind a 6‑foot‑plus driver, as long as the handle and recline angle are set correctly. Once kids move into bulkier rear‑facing convertibles, space tightens, especially behind a tall driver, so a smaller adult may need to sit in front of that seat or you may choose to put the larger child behind the shorter front passenger.
- Families with one infant and one older child often run the infant seat behind the driver and a forward‑facing or booster behind the passenger for easier daycare drop‑offs.
- Parents with two harnessed seats sometimes put both on the outsides and keep the center for an older child, occasional adult, or as a passthrough for pets and cargo.
- Some owners remove the rear head restraints behind forward‑facing seats (and store them safely) so the child seats sit flush against the backrest, improving fit and making installation easier.
Good news on anchor usability
Step-by-Step Child Seat Installation Checklist
R1T Child Seat Installation Checklist
1. Pick the right seating position
Decide which child goes where based on age and seat type. In general, put the <strong>youngest or rear‑facing child</strong> in an outboard LATCH position and reserve the center seat for a forward‑facing or booster‑age child using the seat belt.
2. Locate LATCH anchors or seat belts
For outboard seats, find the lower LATCH anchors between the cushion and seatback and the tether anchor on the rear shelf. For the center seat, identify the shoulder belt, lap belt and its top tether anchor on the shelf.
3. Adjust or remove rear head restraints
If your seat manual allows, remove or raise the R1T’s rear head restraints so the child seat shell rests flat against the vehicle seatback. Store any removed head restraints safely so you can reinstall them when the kids outgrow car seats.
4. Attach and tighten
Follow your child seat’s instructions to attach either the LATCH connectors or the seat belt. In the R1T, expect to press firmly into the cushion and pull the adjuster strap or belt tight. The seat should move <strong>less than 1 inch</strong> side‑to‑side or front‑to‑back at the belt path.
5. Connect the top tether for forward‑facers
When installing a forward‑facing harnessed seat in any rear position, route the tether strap over the seatback to the matching anchor on the rear shelf, then tighten until there is minimal slack. This reduces head movement in a crash.
6. Check recline and front‑seat clearance
Confirm the seat’s recline angle is within the allowed range on the level indicator. Make sure front seats aren’t pressing against rear‑facing shells; if they are, adjust the front seatback or consider moving the child seat to the other side.
7. Re‑check after a test drive
After a few trips, grab the seat at the belt path and verify it’s still tight. It’s easy for belts or LATCH straps to loosen slightly after the first use, especially on new installations.
Common Mistakes to Avoid in an R1T
High‑risk mistakes
- Using lower anchors in the center seat by "borrowing" from both outboard positions, Rivian does not approve this setup.
- Letting a front seat press hard into the back of a rear‑facing convertible, which can change its recline angle and how it performs in a crash.
- Routing the tether strap to the wrong anchor on the rear shelf when multiple seats are installed at once.
- Letting boosters or belt‑positioning seats sit crooked on the R1T’s bench, which can change where the shoulder belt contacts the child.
- Ignoring LATCH weight limits; once the combined weight of your child and seat exceeds the limit, switch to a tight seat‑belt install plus tether.
Shopping a Used Rivian R1T With Kids in Mind
If you’re considering a used Rivian R1T, it pays to walk in with your actual child seats, or at least their measurements, and a checklist. Rear seat packaging hasn’t changed dramatically across 2022–2024 trucks, but every family’s mix of ages, heights and seat models is different.
Fit checks to do during a test drive
- Install at least one rear‑facing and one forward‑facing or booster in the positions you’ll use most.
- Sit in the front seats with your normal driving posture to confirm knee and legroom.
- Have older kids try buckling themselves if they’ll be in boosters or the center position.
- Check door opening angle and step‑in height with a sleeping baby in an infant seat.
How Recharged can help
Every used EV sold through Recharged includes a Recharged Score report with verified battery health and fair‑market pricing, so you can focus on making sure the truck fits your family’s day‑to‑day life.
If you’re shopping online, our EV specialists can talk through your specific child‑seat scenario and help you compare the R1T with other family‑friendly EVs. You can handle the whole purchase digitally and have the truck delivered to your driveway, or visit our Richmond, VA Experience Center if you prefer to test‑fit seats in person.
Rivian R1T Child Seat Fit FAQ
Frequently Asked Questions About Child Seats in the R1T
Key Takeaways for R1T Families
The Rivian R1T isn’t just a fun electric pickup, it can be a capable family hauler if you understand how child seats fit. You get two full LATCH positions and three top tethers, enough width for thoughtful 3‑across setups, and good visibility and comfort for growing kids. The trade‑offs are familiar to any parent who’s owned a midsize SUV: big rear‑facing convertibles can squeeze tall front passengers, and three across requires careful seat choices.
If you’re moving into an R1T from a traditional SUV or minivan, bring your current seats to any test drive and try your real‑world layout. And if you’re exploring a used R1T, Recharged can help you compare trucks, understand long‑term ownership costs, and find a configuration that works for your whole crew, car seats, grandparents, hockey bags and all.