When people search for a “charger fixer”, they’re usually frustrated. Maybe your Level 2 home charger stopped working overnight, a public fast charger keeps erroring out, or you’re worried about buying a used EV with hidden charging issues. This guide walks you through what you can safely fix yourself, what needs a pro, and how to keep both your charger and your EV out of trouble.
Charger fixer, defined
What do people mean by “charger fixer”?
The phrase charger fixer covers a few different situations:
- A homeowner trying to get a wallbox or portable Level 2 charger working again
- An electrician troubleshooting a 240V circuit that keeps tripping when you plug in
- A network technician repairing a DC fast charger that won’t start sessions
- A used‑EV shopper trying to spot charging problems before signing paperwork
In this article we’ll focus on EV charging, not phone or laptop chargers. You’ll get a practical framework: start with safety, figure out whether the problem is your car, the charger, or the power supply, then decide whether this is a DIY fix or a professional job.
Safety first: before you “fix” any charger
Before you channel your inner charger fixer, treat every EV charger like what it is: a high‑power electrical appliance. A typical home Level 2 unit runs on 240 volts and may pull 32–60 amps, more than an electric oven. That’s enough power to start a fire or cause serious injury if you get it wrong.
Essential safety checklist
1. Never open the charger housing
If a fix requires removing the charger’s cover, it’s not a DIY job. Internal components can hold dangerous voltage even when breakers are off.
2. Use the breaker, not the plug, to shut power off
For hard‑wired or NEMA‑outlet chargers, turn off the correct breaker before unplugging or inspecting anything. Label that breaker once you’ve found it.
3. Don’t bypass safety features
Never tape down buttons, bypass a GFCI outlet, or defeat a ground pin to stop nuisance trips. These “annoyances” are there to prevent shock and fire.
4. Avoid repairs in wet conditions
If it’s raining or the charger is wet, limit yourself to app‑based troubleshooting and visual checks. Any hands‑on work should wait until surfaces are dry.
5. Read the manual and warranty
Some brands clearly spell out what owners can do without voiding the warranty. Keep those boundaries in mind before you grab a screwdriver.
When to stop immediately
Quick triage: is it the car or the charger?
A good charger fixer always starts with the same question: is the problem actually the charger? Many issues blamed on the wallbox turn out to be settings in the car or a weak household circuit.
Simple tests to narrow down the problem
Use these in any order depending on what’s available
Test another charger
If possible, plug your EV into a different home charger or a public Level 2 station.
- If it charges normally, your original charger or circuit is suspect.
- If it still won’t charge, the issue may be with the car’s onboard charger or charge‑port hardware.
Try another vehicle
If a friend or family member has an EV, plug their car into your charger.
- Their car charges: your EV may be the problem.
- Neither car charges: the charger or its circuit likely needs attention.
Check charge limits
In your EV’s charging menu, verify:
- Charge current isn’t set very low (e.g., 6A).
- Scheduled charging isn’t delaying start.
- Location‑based charging restrictions are disabled for testing.
Use your car as a diagnostic tool
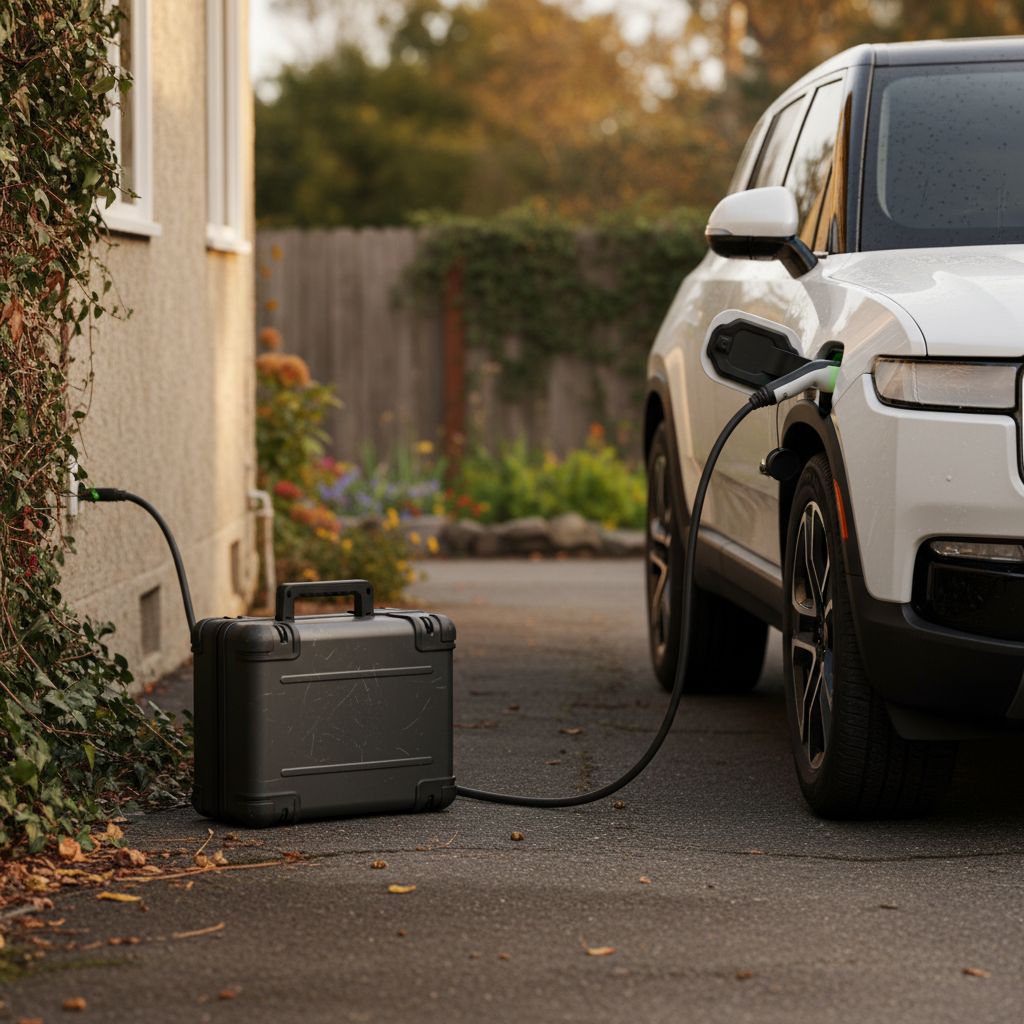
DIY home charger fixes you can try
Once you’ve ruled out obvious issues with the car, there are several low‑risk steps you can take before calling in a charger fixer. These focus on resets, settings, and visible faults, not opening anything up.
Most common home charger complaints
1. Verify power and reset the basics
- Check the breaker panel. Look for a tripped breaker (handle in the middle) for your charger’s circuit. Firmly switch it OFF, then back ON once. If it trips again, stop and call an electrician.
- Confirm outlet integrity (for plug‑in units). Inspect the NEMA 14‑50 or 6‑50 outlet for discoloration, melted plastic, or looseness. If it looks or smells burned, do not reuse it.
- Power‑cycle the charger. Use the app or physical power button, or turn the breaker off for 60 seconds and back on. Many wallboxes clear software glitches after a simple reboot.
2. Inspect the cable and connector
Next, give the charging cable and handle a slow, careful inspection.
- Look for cuts, kinks, or flat spots in the cable insulation.
- Check the connector face for bent pins, melted plastic, or debris.
- Make sure the cable strain relief (where the cable enters the unit) isn’t torn or pulled out.
- Confirm the connector clicks firmly into the car’s charge port, no wobble.
Cable damage is a hard stop

3. Clear software and connectivity glitches
Modern “smart” chargers can act up if Wi‑Fi or backend services fail. In late 2024 and 2025, some owners saw problems when brands changed software platforms or shut down cloud services, leaving hardware working but apps confused.
- Log out and back into the charger app, then retry a session.
- Forget and re‑add the charger in the app if the manufacturer recommends it.
- Temporarily disable Wi‑Fi on the charger (if possible) to see if local control works without cloud services.
- Check for firmware updates, many wallboxes download updates that address bugs and reliability problems.
4. Adjust charging rate and temperature expectations
Sometimes the charger is doing exactly what it should; it’s your expectations that need adjusting. If you see slower speeds than the number on the box, keep these points in mind:
- Your car may not accept the charger’s full amperage. Many EVs are limited to 32–40A AC even if your charger is rated for 48A.
- High battery state of charge (above ~80%) and very cold or very hot temperatures naturally slow charging.
- Some chargers throttle output if they detect high internal temperature to protect electronics. This can happen in hot garages or in direct sun.
Good news: many “problems” aren’t problems
Issues you should leave to a professional
A real charger fixer knows when to step back. If you run into any of the situations below, it’s time for a licensed electrician or an authorized service provider.
Red‑flag problems for pros only
Don’t attempt these fixes yourself
Persistent breaker or GFCI trips
If your charger repeatedly trips a breaker or GFCI outlet, especially immediately on start, there may be a ground fault, undersized wiring, or loose connection.
These are fire‑risk issues and demand proper test equipment and training.
Internal charger faults
Burnt smell, visible scorching inside the housing, or error codes that manual says require service all point to internal component failure.
The fix may involve replacing boards, contactors, or entire units.
Panel capacity problems
If your electrician tells you the panel is overloaded, or you’ve added big loads (heat pump, range, dryer) after installing a charger, you may need a service upgrade.
This is a whole‑home electrical project.
Backend/network failures
For commercial or networked chargers, problems with billing systems, OCPP servers, or fleet management tools are handled by the network operator.
Site hosts should open a support ticket rather than trying to “fix” hardware in the field.
Who to call first
“Fixing” public EV chargers: what you can and can’t do
At public DC fast chargers, being a charger fixer doesn’t mean opening cabinets or rebooting networking gear. That’s the operator’s job. But there are smart steps you can take to get yourself moving and help improve reliability for everyone.
Things you can safely try
- Move to another stall. Some cabinets share power; one bad dispenser doesn’t mean the whole site is down.
- Switch payment method. If a credit‑card reader fails, try the network’s app, RFID card, or Plug & Charge if your car supports it.
- Unplug, wait, and replug. A clean reconnect can clear handshake glitches between the car and charger.
- Check cable slack. Avoid stretching or twisting heavy DC cables; tension can interrupt the connection.
Things you should not do
- Never press emergency‑stop buttons repeatedly to “reset” hardware.
- Don’t open panels, unlatch covers, or tamper with locks or vents.
- Don’t force a frozen connector release; use the station’s app or call support to unlock it.
- Avoid “wiggling” the plug under load, this can arc and damage contacts in both car and charger.
Reporting problems actually helps
What EV charger repair usually costs
Costs vary widely with the cause of failure, whether the charger is under warranty, and local labor rates. But you can ballpark a few scenarios to decide when DIY troubleshooting is worth your time.
Typical EV charger “fixer” scenarios and cost ranges
Actual prices depend on your location and hardware brand; warranty coverage can bring some items close to $0 out of pocket.
| Scenario | Who fixes it | What’s involved | Typical cost |
|---|---|---|---|
| One‑time breaker trip; no repeat | Homeowner | Reset breaker once, check for obvious issues | $0 |
| Outlet getting warm during charging | Electrician | Inspect/replace NEMA outlet and possibly wiring | $150–$400 |
| Wallbox failure under warranty | Manufacturer installer | Diagnostics and full unit replacement | Often $0–$300 (shipping/labor) |
| Out‑of‑warranty wallbox failure | Electrician/installer | Replace charger with new unit, reuse wiring if safe | $500–$1,200 including hardware |
| Panel upgrade for higher‑amp charger | Electrical contractor | Upgrade service (e.g., 100A → 200A), new breakers | $2,000–$5,000+ depending on home |
Use these ballpark figures as planning tools, not quotes.
Avoid the false economy of under‑sizing
Preventive maintenance: how not to need a charger fixer
The cheapest fix is the one you never need. A few simple habits dramatically reduce the odds that you’ll be Googling “charger fixer near me” at 11 p.m. before a road trip.
Low‑effort habits that extend charger life
1. Coil, don’t kink, the cable
After charging, loosely loop the cable on its holder. Avoid tight bends, pinching under tires, or leaving it as a trip hazard.
2. Keep connectors clean and dry
Use the holster so rain and road salt don’t sit in the plug. If the connector gets dirty, wipe it with a soft, dry cloth, no solvents.
3. Glance at hardware weekly
Once a week, take five seconds to look for cracks, discoloration, or sagging conduit. Early detection keeps small issues from turning into big ones.
4. Respect the duty cycle
If your charger or circuit runs near its maximum rating for hours every night, talk to an electrician about stepping down amperage or upgrading the circuit.
5. Update firmware when offered
Many reliability fixes come via software. Allow automatic updates or run them manually from the app when prompted.
Well‑installed chargers are boring, in a good way
Charger health when you’re buying a used EV
If you’re shopping for a used EV, the last thing you want is to discover charging surprises after the ink is dry. A smart charger fixer mindset during shopping can help you avoid both battery problems and charger headaches.
Questions to ask the seller
- How was the car charged? Home Level 2 most of the time, or heavy DC fast‑charging use?
- Any history of charge‑port repairs? Ask about sticky connectors, water ingress, or prior accident damage in that area.
- Is a home charger included? If so, confirm the brand, age, and whether it’s still under warranty.
- Where was the charger installed? Outdoor, unprotected locations see more weather‑related wear.
Checks you can perform
- Do at least one full AC charging session during the test drive period.
- Inspect the included portable charger for cable damage or bent pins.
- Confirm that the charge‑port door opens smoothly and seals well.
- Listen for unusual noises from the onboard charger fan during charging.
At Recharged, every vehicle comes with a Recharged Score Report that includes verified battery health and a detailed look at charging behavior. That means fewer unknowns about whether a previous owner abused DC fast charging or lived with a flaky charger that masked deeper issues.
Leverage expert help when you buy
Charger fixer FAQ
Frequently asked questions about being a charger fixer
Key takeaways
Being your own charger fixer doesn’t mean grabbing tools and opening high‑voltage hardware. It means knowing how to triage problems, handle simple resets and inspections, and recognize when a licensed professional or network operator has to step in. Do that well and your charger ownership experience becomes pleasantly boring, plug in, charge, repeat.
If you’re also evaluating your next EV, choosing the right car and charging setup together matters just as much as learning how to fix common issues. With Recharged you get transparent battery health data, fair pricing, and EV specialists who can talk you through real‑world charging, home, public, and on the road, so you spend less time worrying about “what if it breaks?” and more time simply enjoying the drive.